
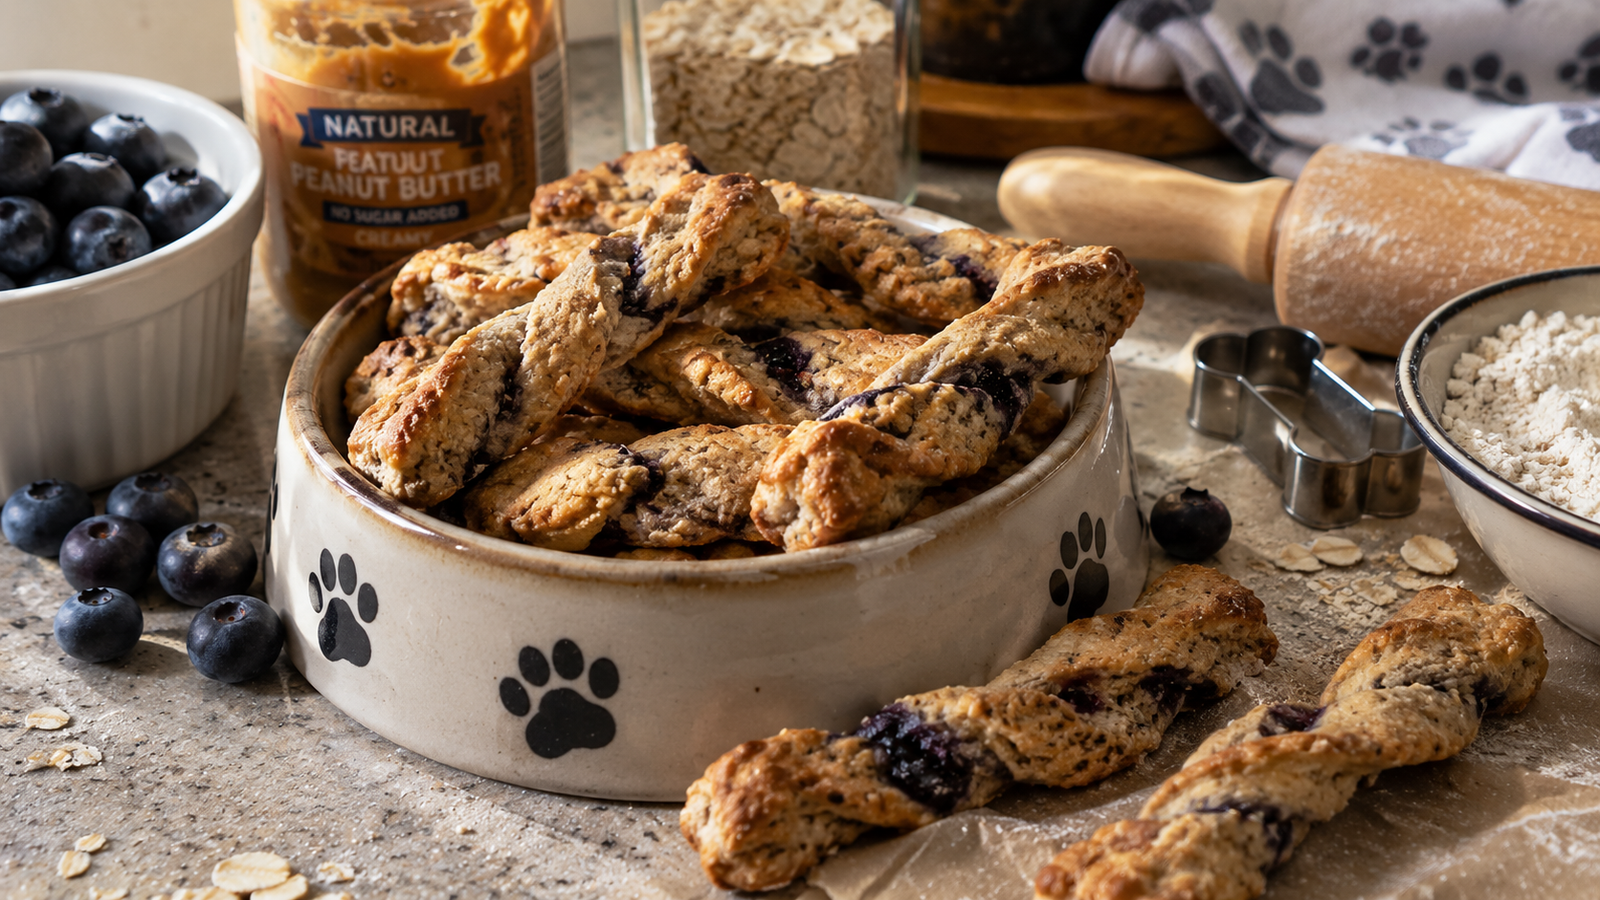
There are a few homemade dog treats that look much more complicated than they actually are, and these blueberry and peanut butter twists are a perfect example. The dough comes together with a handful of simple ingredients, but rolling it into little twisted ropes makes the finished treats feel a bit more special. I like the combination of blueberries and peanut butter here because the blueberries add a naturally fruity flavor while the peanut butter gives the treats a richer taste and helps bring the dough together. There is no need for added sugar, frosting, or complicated decorations. The twists are also easy to make in different sizes, so you can keep them small for everyday treating or make slightly larger ones for a special homemade snack. Quick Answer Yes, dogs can generally enjoy blueberries and xylitol-free peanut butter in moderation. Fresh or plain frozen blueberries are suitable for most dogs, while peanut butter should be checked carefully for xylitol, also known as birch sugar, before it is used. These homemade twists combine both ingredients with oat flour and egg to create a simple baked dog treat. Recipe Snapshot Prep Time 15 minutes Bake Time 20–25 minutes Total Time About 40 minutes Yield 14–16 twists Oven 350°F / 175°C Difficulty Easy Storage Refrigerate up to 1 week Key Takeaways Why Blueberries and Peanut Butter Work in Dog Treats Blueberries are naturally sweet and provide fiber, vitamins, minerals, and antioxidant compounds. They are generally safe for dogs when offered in appropriate amounts. Fresh or plain frozen blueberries are preferable to sweetened or syrup-packed versions. Peanut butter adds flavor and helps give these treats their soft, workable dough. However, it is also relatively high in fat and calories, so it works best as a small ingredient rather than something dogs should eat in large quantities. The most important safety step is checking the ingredient label. Never use peanut butter containing xylitol or birch sugar. Xylitol is highly toxic to dogs and can cause a dangerous drop in blood sugar and other serious effects. How to Make Blueberry and Peanut Butter Twists for Dogs Ingredients 1. Prepare the Oven Preheat the oven to 350°F (175°C). Line a baking sheet with parchment paper. 2. Mix the Flour and Peanut Butter Add the oat flour and peanut butter to a large mixing bowl. Stir until the mixture resembles coarse crumbs and the peanut butter is evenly distributed. 3. Add the Blueberries and Egg Lightly mash the blueberries with a fork, leaving some small pieces intact. Add the blueberries and egg to the flour mixture. Stir until the dough begins coming together. The dough may look crumbly at first, so don’t add all the water at once. 4. Adjust the Dough Add water one tablespoon at a time, mixing after each addition. Stop when the dough forms a firm ball that can be handled without being excessively sticky. If the dough becomes too soft, add a little more oat flour. 5. Form the Twists Divide the dough into roughly 14–16 portions. Roll each portion into a thin rope about 5–6 inches long. Fold the rope in half, then twist the two strands around each other two or three times. Pinch the two ends together firmly. Don’t worry if every twist looks slightly different. Small variations are normal with homemade dough. 6. Bake Arrange the twists on the prepared baking sheet with a little space between them. Bake for 20–25 minutes, or until the treats feel firm and are lightly golden around the edges. For a softer treat, begin checking around 18–20 minutes. 7. Cool Completely Remove the baking sheet from the oven and allow the twists to cool completely. They will become firmer as they cool. Do not seal warm treats in a container because trapped heat and moisture can encourage spoilage. Serving, Storage & Variations Serving Size These should be treated as occasional snacks rather than a replacement for your dog’s regular balanced diet. A small dog may only need part of a twist, while a larger dog may be able to have one whole twist depending on its overall diet and calorie needs. As a general guideline, treats and other extras should make up no more than about 10% of a dog’s daily calories. Storage Store completely cooled twists in an airtight container in the refrigerator for up to 1 week. For longer storage, freeze the treats in a single layer before transferring them to a freezer-safe container or bag. They can be frozen for approximately 3 months for best quality. Softer Twists For dogs that prefer a softer texture, bake for slightly less time and allow the treats to cool completely before serving. Always consider your individual dog’s chewing ability when choosing treat texture. Firmer Twists For a firmer biscuit-like texture, bake closer to the full 25 minutes, watching carefully toward the end so the treats do not become excessively hard. Easy Shape Alternative The twisting step is mostly for appearance. If you don’t want to shape individual ropes, roll the dough into small balls and flatten them slightly before baking. You can also cut the dough into small strips or use a small cookie cutter. Blueberry Substitutions A small amount of mashed banana or finely diced, cored apple can work in place of the blueberries. Because different fruits contain different amounts of moisture, you may need to adjust the oat flour slightly. Common Mistakes Using the Wrong Peanut Butter This is the most important mistake to avoid. Always check the ingredient list for xylitol or birch sugar before using peanut butter in homemade dog treats. Adding Too Much Water Blueberries release moisture as they are mashed, so the dough may need less water than expected. Add it gradually rather than pouring in the full amount at once. Using Sweetened Blueberries Skip blueberry pie filling, canned berries in syrup, sweetened dried blueberries, and flavored fruit products. Plain fresh or frozen blueberries are the better choice. Making the Ropes Too Thin Very thin
Chicken Bone Broth Gummy Treats for Dogs
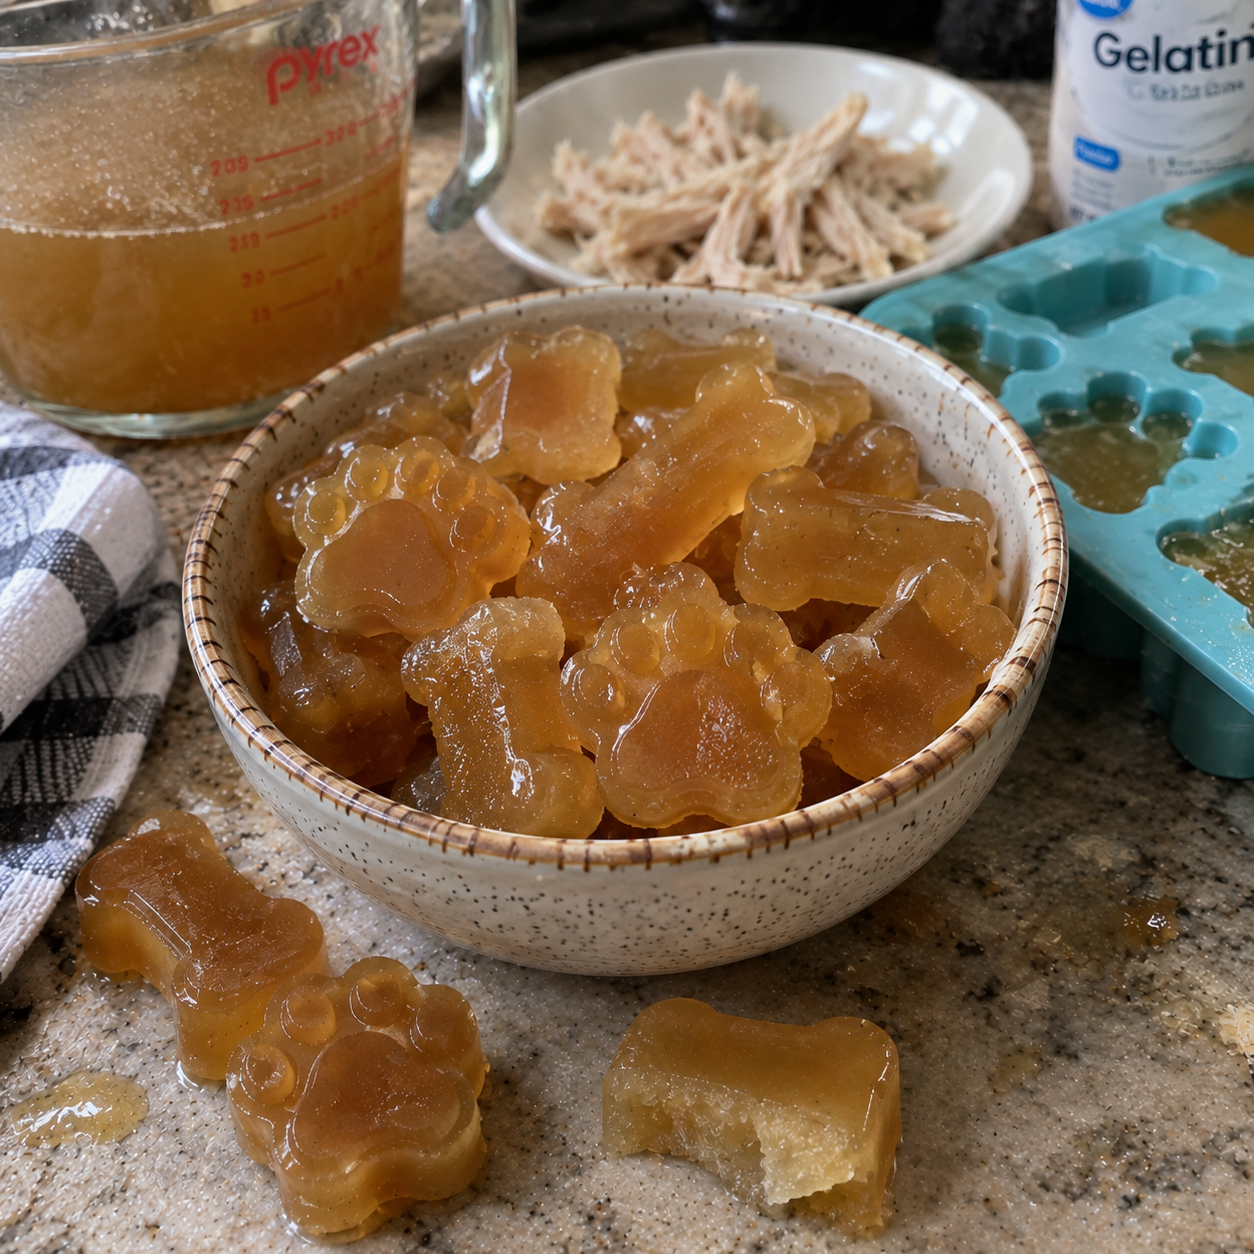
Some homemade dog treats are worth keeping in the refrigerator simply because they’re so easy to grab when you need a quick reward. These chicken bone broth gummy treats are one of those recipes. They’re soft, chewy, savory, and made with just a couple of simple ingredients. The broth gives them a rich chicken flavor, while plain gelatin transforms the liquid into little bite-sized gummies that are easy to portion. I make these in small paw or bone-shaped silicone molds, which makes the finished treats especially cute. Once they’re set, they’re ready to keep in the fridge for a quick homemade snack whenever your dog deserves a little something extra. The important part is choosing the right broth. It needs to be plain and free from onion, garlic, chives, excessive salt, and seasoning blends. Quick Answer Yes, dogs can have homemade chicken bone broth gummy treats when they’re made with dog-safe chicken broth and plain, unflavored gelatin. The broth should contain no onion, garlic, chives, or other unsafe ingredients, and any homemade broth must be thoroughly strained so that no bones or bone fragments remain. These gummies are intended as an occasional treat rather than a replacement for your dog’s regular food. Recipe Snapshot Detail Information Prep Time 10 minutes Chill Time 2–3 hours Total Time About 2 hours 10 minutes Yield 20–30 small gummies Difficulty Easy Storage Refrigerator Main Ingredients Chicken bone broth + unflavored gelatin Key Takeaways What Makes These Chicken Bone Broth Gummies Dog-Friendly? The recipe is intentionally simple. Chicken broth provides the savory base, while gelatin gives the treats their firm, chewy texture. There is no need to add sugar, salt, spices, artificial flavors, or complicated supplements. The biggest consideration is the broth itself. Commercial chicken broths can contain ingredients that aren’t appropriate for dogs, particularly onion and garlic. Both are members of the Allium family and can cause problems for dogs. For that reason, always read the label before using a packaged broth. A good broth for this recipe should be: If you’re making the broth yourself, allow it to cool and remove excess fat from the surface if there is a substantial amount. How to Make Chicken Bone Broth Gummy Treats for Dogs Ingredients Instructions 1. Check the broth Read the ingredient list carefully before you begin. Make sure the broth contains no onion, garlic, chives, heavy seasoning, or other ingredients that aren’t appropriate for dogs. If you’re using homemade chicken bone broth, strain it carefully to remove all bones and bone fragments. 2. Warm the broth Pour the broth into a small saucepan. Heat it gently over low to medium-low heat until warm. It doesn’t need to reach a rolling boil. 3. Add the gelatin Slowly sprinkle the gelatin over the warm broth while whisking continuously. Continue whisking until the gelatin has completely dissolved and the liquid is smooth. If the gelatin is clumping, give it another minute of gentle whisking rather than turning the heat up too high. 4. Fill the molds Place the silicone molds on a small baking sheet or tray. This makes them much easier to carry to the refrigerator without spilling. Carefully pour the warm broth mixture into the cavities, filling them almost to the top. Small paw, bone, or heart-shaped molds work particularly well. 5. Refrigerate Place the filled molds in the refrigerator. Let them chill for about 2–3 hours, or until the gummies are completely firm. Larger molds may need additional chilling time. 6. Remove the gummies Once firm, gently press the silicone mold around each treat to release it. Transfer the finished gummies to an airtight container. Keep them refrigerated until you’re ready to serve them. Serving, Storage & Variations How Many Gummies Can a Dog Have? Start small, especially if your dog hasn’t had gelatin or bone broth before. For many dogs, one small gummy is a reasonable starting portion. Larger dogs may tolerate a larger portion, while very small dogs may need only a small piece. Treats should remain a small part of the overall diet rather than replacing a complete and balanced dog food. How to Store Them Keep the gummies in an airtight container in the refrigerator. Because these are moist homemade treats without preservatives, they shouldn’t be stored at room temperature. For best quality, use them within about 5–7 days. Discard them if you notice mold, an unusual smell, discoloration, or another obvious sign of spoilage. Can You Freeze the Gummies? Yes. Place the gummies in a freezer-safe container or bag and freeze them in a single layer until firm. Once frozen, they can be transferred into a larger container. Thaw individual portions in the refrigerator before serving. The texture may be slightly different after freezing and thawing, but they can still work well as homemade treats. Can You Add Chicken? You can add a small amount of plain, fully cooked chicken if you want a little texture in the gummies. Remove all bones, skin, and excess fat first, and chop the chicken very finely. For the simplest version, however, I prefer leaving the gummies smooth. Can You Add Pumpkin? A small amount of plain pumpkin puree can be mixed into the broth before adding the gelatin. Make sure it is plain pumpkin puree, not pumpkin pie filling, which can contain added sugar and spices. Keep additions modest so the gummies remain easy to portion. Common Mistakes Using Regular Seasoned Chicken Broth This is probably the biggest mistake to avoid. Some chicken broths contain onion, garlic, concentrated seasonings, or a significant amount of sodium. Don’t choose a broth simply because the front of the package says “chicken broth.” Check the ingredient list. Using Chicken Bones in the Gummies Bone broth is made using bones, but that does not mean the finished treats should contain pieces of bone. Always strain homemade broth thoroughly. Chicken bones can splinter and may cause choking, obstruction, or injury to the digestive tract. Using Flavored Gelatin Avoid flavored gelatin dessert mixes. They can contain sugar,
Can You Cover a Puppy Crate? Safe Tips, Benefits & What to Avoid
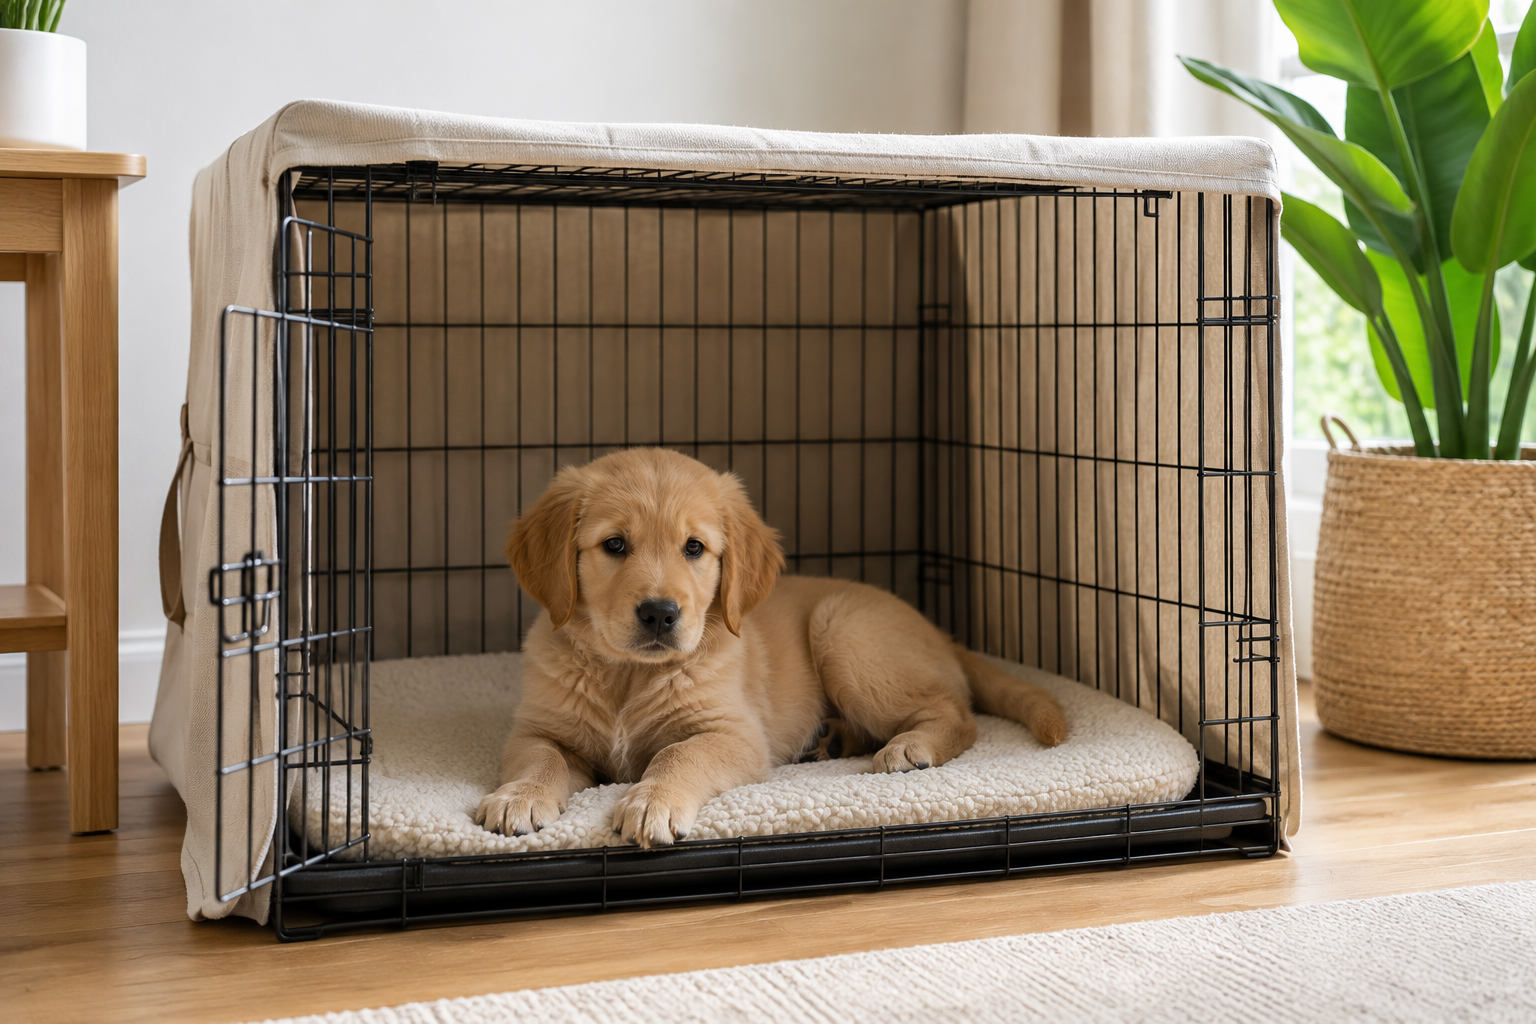
Quick Answer: Yes, you can cover a puppy crate. A lightweight, breathable cover over part of the crate can help reduce visual distractions and create a quieter, more enclosed resting space for some puppies. The safest approach is to maintain good airflow, avoid trapping heat, and watch how your puppy responds. A crate cover should make the crate feel comfortable—not restrict your puppy or hide signs of distress. Quick Setup Checklist Why Cover a Puppy Crate? A crate cover can make the space feel more private and den-like. For some puppies, reducing visual stimulation can make it easier to settle, particularly when the crate is in a busy part of the home. A cover may reduce distractions from: Some puppies may relax more easily when they have a quieter, partially enclosed space. Can a Crate Cover Help With Anxiety? It may help puppies whose restlessness is caused by visual stimulation or a busy environment. However, a cover isn’t a treatment for separation anxiety or significant behavioral problems. If your puppy panics, repeatedly tries to escape, or shows severe distress when alone, address the underlying issue rather than simply covering the crate. What’s the Safest Way to Cover a Puppy Crate? For most puppies, partial coverage is the best starting point. You can cover the back and one or both sides while leaving the front open. This provides some privacy without completely enclosing the puppy. Crate Setup Potential Benefit Main Concern Back covered Reduces distractions Less privacy Two sides covered More privacy while maintaining airflow Monitor temperature Three sides covered Creates a stronger den-like feeling Good ventilation is essential Completely covered Creates a darker environment Greater risk of restricted airflow and trapped heat Choosing a Crate Cover Choose a lightweight, breathable material, such as: A lightweight blanket may also work if it doesn’t restrict airflow and your puppy can’t pull it through the bars. Avoid thick materials that can trap heat, particularly in warm rooms. Also avoid loose fabric if your puppy likes to chew. Swallowing pieces of fabric can create a serious problem. Can Covering a Crate Make a Puppy Too Hot? Yes. A thick cover or excessive coverage can reduce airflow and trap heat inside the crate. This is particularly important in: Watch your puppy for signs of discomfort, including: If your puppy seems too warm, remove the cover and move the crate to a cooler, well-ventilated location. If your puppy appears seriously unwell or has difficulty breathing, seek veterinary care promptly. How to Introduce a Puppy to a Covered Crate Introduce the cover gradually rather than suddenly covering the entire crate. Step 1: Start With an Uncovered Crate Allow your puppy to become comfortable entering, resting, and sleeping in the crate. Reward calm behavior. Step 2: Cover One Side Place a lightweight cover over one side while keeping most of the crate open. Watch your puppy’s reaction. Step 3: Increase Coverage Slowly If your puppy remains relaxed, you can gradually cover another side. There is no need to cover more if your puppy is already comfortable. Step 4: Follow Your Puppy’s Behavior Some puppies enjoy more privacy. Others prefer being able to see what is happening around them. If your puppy: Reduce the coverage or remove it. How Long Should You Cover a Puppy Crate? There isn’t one fixed time limit that applies to every puppy. The important factors are temperature, airflow, purpose, and your puppy’s behavior. A partial cover can be used during: Provided your puppy remains comfortable and the crate stays properly ventilated. You don’t need to stop using a cover at a particular age. Some dogs continue enjoying a partially covered crate as adults. Consider reducing or removing the cover if your puppy: Frequently Asked Questions Should I cover my puppy’s crate at night? Yes, you can use a partial breathable cover at night if your puppy is comfortable with it and the crate remains cool and well ventilated. Should the front of the crate be covered? It’s generally best to leave the front open. This allows airflow and makes it easier to monitor your puppy. Can I use a heavy blanket over a puppy crate? A heavy blanket isn’t ideal because it can restrict airflow and trap heat. A lightweight breathable cover is preferable. Conclusion Yes, you can cover a puppy crate—but you don’t need to cover the entire crate. A lightweight, breathable cover over one or two sides is a good place to start. If your puppy remains calm and comfortable, you can adjust the coverage according to their needs. Always prioritize: If your puppy becomes anxious, overheated, or starts chewing the cover, remove it. A crate cover should help create a calm, comfortable resting space, not make the crate feel restrictive. Safety Disclaimer This article provides general pet-care information and does not replace individualized veterinary or professional dog-training advice. If your puppy shows signs of overheating, breathing difficulty, severe distress, or another concerning health problem, contact a veterinarian promptly.
Apple and Carrot Chew Sticks for Dogs
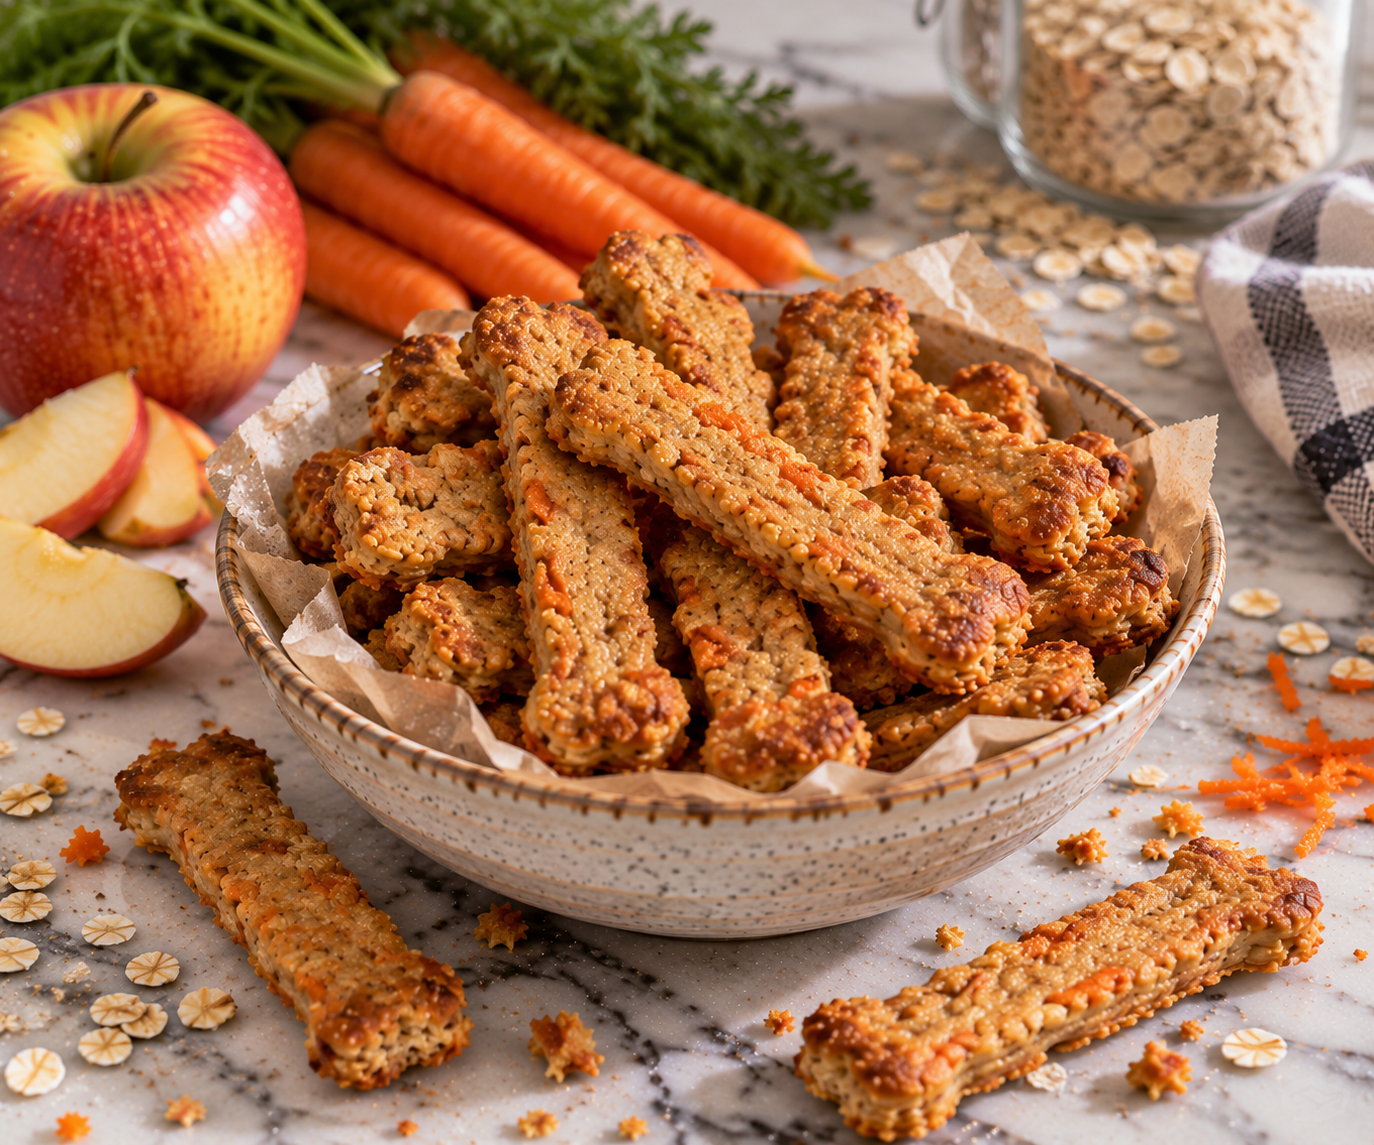
I love making homemade treats that feel a little more substantial than an ordinary biscuit, and these apple and carrot chew sticks are one of my favorites. They use simple ingredients, are easy to shape by hand, and bake into firm little sticks with a naturally sweet apple-and-carrot flavor. I especially like making these when I want something my dog can nibble on for a little longer. The grated apple keeps the sticks flavorful while the carrot adds a little texture, and the oats give them a rustic homemade feel. They’re also easy to make in a larger batch, so I can keep some ready for the week and freeze the rest for later. Quick Answer Yes, dogs can enjoy homemade apple and carrot chew sticks when they’re made with dog-safe ingredients and served appropriately. Apples should be prepared without the stem, core, or seeds, while carrots should be washed and grated or otherwise prepared into a manageable texture. Both can be suitable treats for dogs in moderation. These homemade sticks are intended as treats, not a replacement for a complete diet or professional dental chew. Because every dog chews differently, supervise your dog the first few times you offer one. Recipe Snapshot Details Prep time 15 minutes Bake time 40–45 minutes Cooling time About 1 hour Total time About 2 hours Yield About 16 chew sticks Oven temperature 350°F / 175°C Storage Refrigerator or freezer Key Takeaways Are Apple and Carrot Chew Sticks Safe for Dogs? Apples and carrots can both be offered to dogs as occasional treats when prepared properly. Apples contain fiber and several vitamins, while carrots provide fiber and nutrients including beta-carotene. The important part is how they’re prepared. For the apple, remove the stem, core, and seeds before grating. Don’t simply grate around the core and leave pieces mixed into the dough. The seeds and core aren’t ingredients you want in homemade dog treats. Carrots should be washed well and grated finely for this recipe. Grating makes them easier to distribute throughout the dough and gives the finished sticks a more consistent texture. I also keep this recipe intentionally simple. There is no added sugar, salt, chocolate, raisins, onion, garlic, or heavily seasoned ingredients. A Note About the Word “Chew” These are baked homemade chew sticks, not veterinary dental chews or indestructible chew toys. The finished texture can range from firm and crunchy to slightly chewy depending on how thick you make them and how thoroughly they dry. Never assume a homemade treat is safe to leave with a dog unattended simply because it is called a “chew.” How to Make Apple and Carrot Chew Sticks Ingredients Step 1: Prepare the Apple and Carrot Wash the apple and carrot thoroughly. Peel and remove the apple’s stem, core, and seeds. Grate the apple finely. Peel the carrot if needed and grate it using the smaller holes of a box grater. If the grated apple is particularly juicy, gently press out some of the excess liquid. You want enough moisture to help form the dough without making it wet and sticky. Step 2: Make the Dough Add the grated apple, grated carrot, whole-wheat flour, and rolled oats to a large mixing bowl. Stir everything together so the fruit and vegetables are evenly distributed. Add the egg and applesauce and mix until the ingredients begin forming a dough. If the mixture still looks dry or crumbly, add water one tablespoon at a time until the dough holds together when pressed. Don’t add all the water automatically. Apples and carrots vary in moisture, so your dough may need less. Step 3: Shape the Chew Sticks Lightly flour your work surface and turn out the dough. Roll it into an even sheet about ½ inch thick. Cut the dough into strips approximately 4 inches long and ½ inch wide. You can make them shorter for small dogs. Keeping the pieces relatively uniform helps them bake at the same rate. Place the sticks on a parchment-lined baking sheet with a little space between each one. Step 4: Bake Preheat your oven to 350°F (175°C). Bake the chew sticks for approximately 40–45 minutes, or until they’re golden and feel firm. For a firmer, drier texture, turn the oven off after baking and leave the sticks inside while they cool gradually. Once completely cool, transfer them to a wire rack if needed and allow any remaining warmth or moisture to escape. Serving, Storage & Variations How Much Should You Give Your Dog? Start with a small piece, especially if your dog hasn’t had homemade apple or carrot treats before. The appropriate amount depends on your dog’s size, activity level, regular diet, and overall calorie needs. Treats should remain a limited part of the daily diet rather than replacing balanced food. For smaller dogs, make shorter and thinner sticks from the beginning rather than simply breaking a large, very hard stick into pieces. Storage Once completely cool, store the chew sticks in an airtight container in the refrigerator. For longer storage, freeze them in a freezer-safe container or bag with parchment between layers. Thaw frozen treats in the refrigerator before serving. If you notice mold, an unusual smell, or significant moisture buildup, discard the affected treats. Make Them Smaller For puppies, small breeds, or dogs that prefer smaller treats, roll the dough thinner and cut shorter sticks. The goal is to create a size and texture that suits your individual dog rather than treating one stick size as appropriate for every dog. Use Oat Flour If you prefer, replace some or all of the wheat flour with plain oat flour. The dough may behave slightly differently, so add the liquid gradually and stop as soon as the mixture becomes workable. Add Pumpkin For a seasonal variation, you can replace some of the applesauce with plain pumpkin puree. Use 100% plain pumpkin, not pumpkin pie filling or a seasoned pumpkin mixture. Common Mistakes Leaving the Apple Core in the Mixture Don’t grate the whole
Homemade Dog Ice Cream
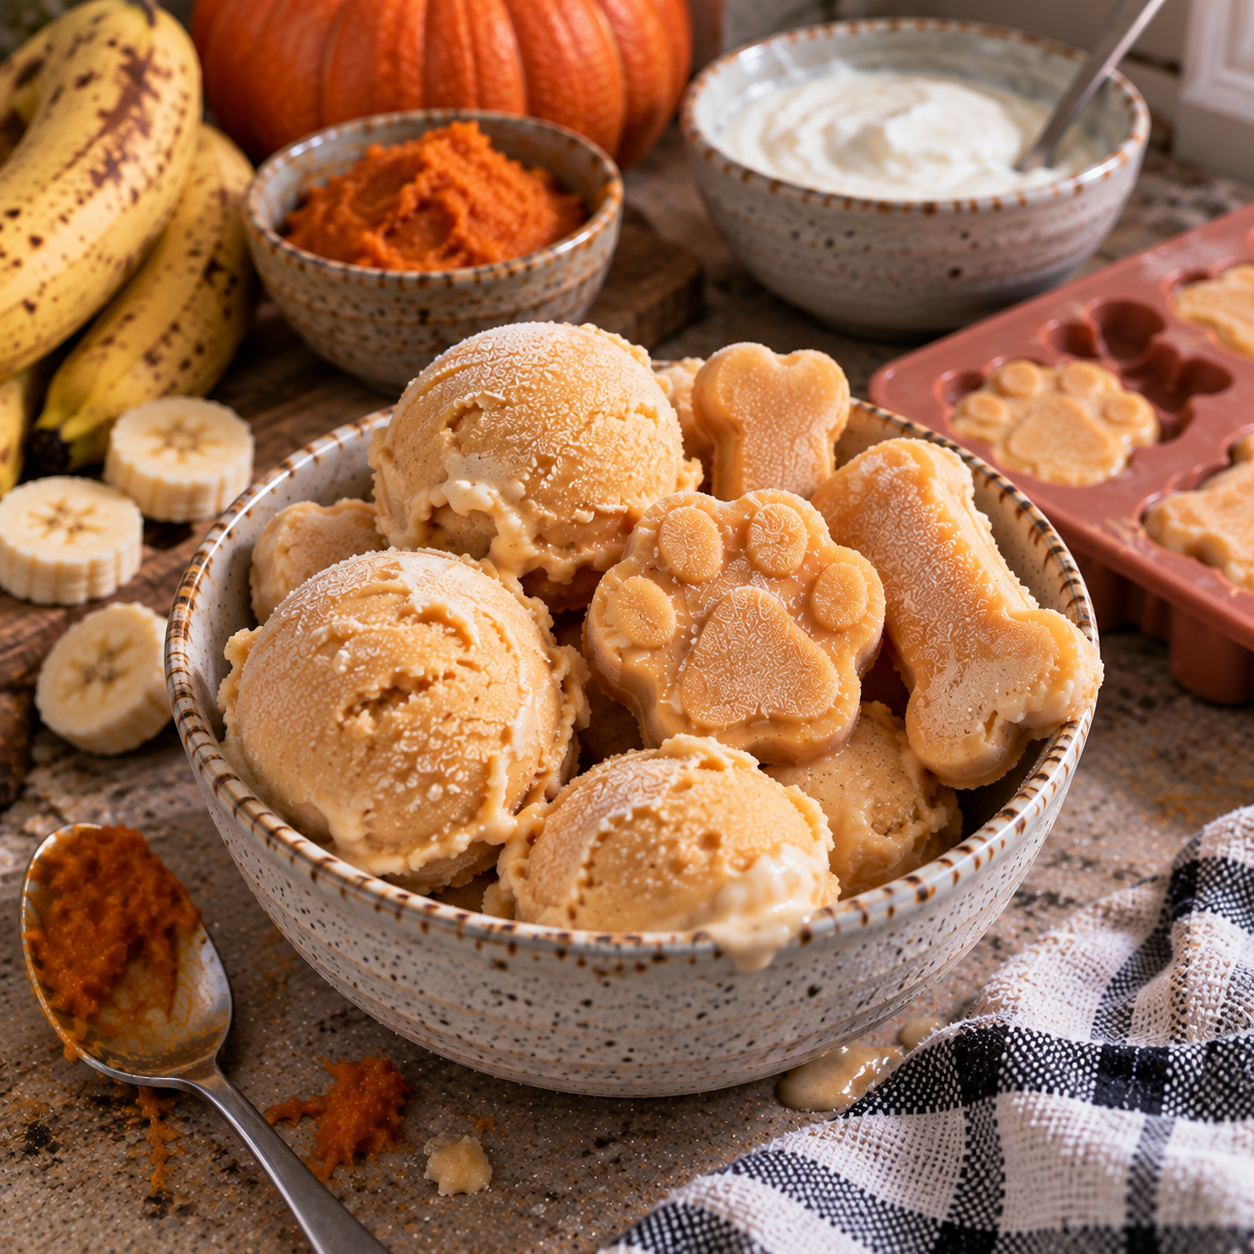
I love making little frozen treats for my dog when the weather gets warm, and homemade dog ice cream is one of the easiest ones to keep in the freezer. There is something especially fun about scooping out a little frozen treat and watching your dog enjoy something that feels just as special as ice cream without all the extras found in many human desserts. This version is creamy, naturally sweet from banana, and gets a lovely texture from plain Greek yogurt and pumpkin. It takes only a few minutes to blend together, and you can freeze it in small silicone molds or a shallow container for easy portions. I usually make a small batch and keep individual portions in the freezer so I always have a cool treat ready for a warm afternoon. Quick Answer Yes, you can make ice cream-style treats for dogs, but traditional human ice cream isn’t a good everyday choice. It is often high in sugar and fat, and many dogs don’t tolerate dairy well. A homemade version made with plain unsweetened Greek yogurt, ripe banana, and 100% pumpkin puree is a simpler option for dogs that tolerate these ingredients. Always check yogurt and other packaged ingredients carefully and avoid products containing xylitol or other unsafe sweeteners. Recipe Snapshot Prep Time 10 minutes Freeze Time 4–6 hours Total Time About 4–6 hours Yield About 12–16 small treats Difficulty Easy Storage Freezer Key Takeaways Why This Dog Ice Cream Works The base of this recipe is intentionally simple. Plain Greek yogurt gives the mixture its creamy texture. Greek yogurt is often easier for dogs to tolerate than regular milk or ice cream, but individual dogs can still react to dairy. Banana adds natural sweetness and helps make the frozen mixture smoother. It does contain natural sugar, so a little goes a long way. 100% pumpkin puree adds flavor and a soft texture while contributing fiber. Make sure the only ingredient is pumpkin. Pumpkin pie filling is a completely different product and should not be used. Together, these ingredients make a soft, scoopable frozen treat without the need for sugar, cream, chocolate, or artificial sweeteners. How to Make Homemade Dog Ice Cream Ingredients Instructions 1. Prepare the banana Peel the banana and break it into smaller pieces. 2. Add the ingredients Place the banana, Greek yogurt, and pumpkin puree into a blender or food processor. 3. Blend until creamy Blend until the mixture is smooth and thick. If it is difficult to blend, add 1 tablespoon of water at a time until it moves easily. 4. Taste-free check Don’t add sugar, honey, syrup, vanilla ice cream, or other sweeteners. The banana provides enough natural sweetness for this recipe. 5. Portion the mixture Spoon the mixture into small silicone molds, ice cube trays, or a shallow freezer-safe container. 6. Freeze Freeze for about 4–6 hours, or until completely firm. 7. Serve Remove one small portion from the freezer and let it sit for a few minutes if it is extremely hard. Serve it in your dog’s bowl or on a suitable surface where they can lick it safely. Serving, Storage & Variations How Much Dog Ice Cream Can I Give? Start with a small portion the first time. For small dogs, one small frozen bite may be enough to start. Medium and large dogs can generally have a little more, but the appropriate amount depends on their overall diet, size, activity level, and calorie needs. Treats should remain a small part of the daily diet rather than replacing a balanced dog food. How to Store It Once frozen, transfer the treats to an airtight freezer-safe container or freezer bag. For the best texture and flavor, use them within about 1–2 months. Pumpkin-Free Version If you don’t have pumpkin, you can simply blend: Freeze the mixture in small portions. Dairy-Free Version If your dog doesn’t tolerate dairy, don’t simply assume regular yogurt will be suitable. A dog-safe dairy-free alternative can be used instead, but check the ingredient label carefully for added sweeteners and other ingredients that aren’t appropriate for dogs. Blueberry Version You can replace some of the banana with a small amount of fresh blueberries for a different flavor. Keep the fruit portion modest and avoid sweetened fruit products. Peanut Butter Version A small amount of natural peanut butter can also be blended into the mixture. Always check the ingredient list and never use peanut butter containing xylitol. Common Mistakes Using Regular Human Ice Cream Human ice cream can contain large amounts of sugar and fat, along with ingredients that aren’t appropriate for dogs. Make a separate dog-friendly frozen treat instead. Choosing Flavored Yogurt Vanilla, fruit-on-the-bottom, dessert-style, and other flavored yogurts can contain added sugar or sweeteners. Stick with plain, unsweetened yogurt. Using Pumpkin Pie Filling This is one of the easiest mistakes to make. Use 100% plain pumpkin puree, not pumpkin pie filling. Pie filling can contain added sugar and spices that aren’t appropriate for dogs. Adding Sweeteners There is no reason to add sugar, syrup, honey, or artificial sweeteners to this recipe. In particular, avoid xylitol, which is highly toxic to dogs. Making the Portions Too Large A frozen treat can take longer for a dog to eat than a soft snack, but that doesn’t mean it should be huge. Small molds make it much easier to control portions. Giving Too Much at Once Even dog-friendly ingredients can cause digestive upset when introduced too quickly or given in excessive amounts. Start small and see how your dog responds. FAQ Can dogs eat ice cream? Dogs should not regularly eat human ice cream. It can be high in sugar and fat, and many dogs have difficulty digesting dairy. Some ice creams may also contain ingredients that are dangerous to dogs. Can I use vanilla yogurt? It is better to use plain, unsweetened yogurt. Flavored yogurts can contain added sugar or sweeteners that you don’t need in a homemade dog treat. Can puppies have homemade dog ice
Frozen Pumpkin Yogurt Dog Treats
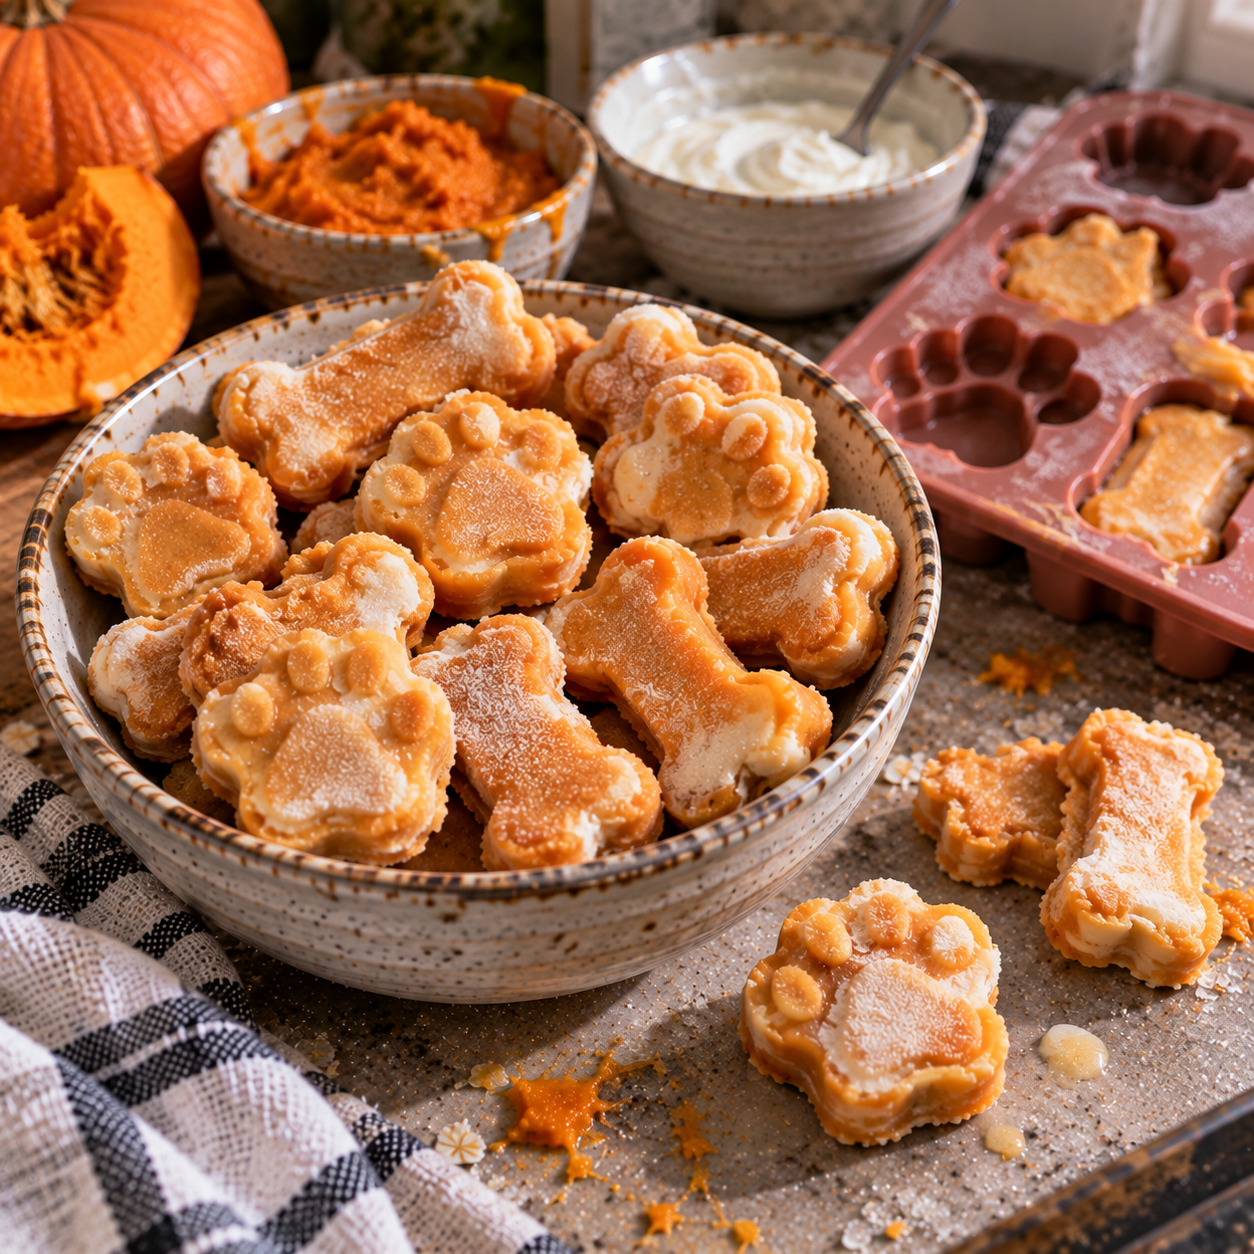
I love having a few homemade treats in the freezer that I can make in just a few minutes, and these frozen pumpkin yogurt dog treats are one of the easiest. There’s no oven, no complicated dough, and barely any cleanup—just a bowl, a silicone mold, and two simple ingredients. The combination of creamy plain yogurt and smooth pumpkin makes a soft, refreshing treat that dogs can enjoy straight from the freezer. I especially like making these in little paw and bone molds because they’re easy to portion and look adorable when they come out. They’re also a great recipe to have on hand when you have leftover plain pumpkin in the fridge. Quick Answer Yes, dogs can enjoy frozen pumpkin yogurt treats when they’re made with plain 100% pumpkin puree and plain, unsweetened yogurt that contains no xylitol or other unsafe sweeteners. Pumpkin is a source of fiber, while plain yogurt can provide protein and, depending on the product, live cultures. The key is keeping the recipe simple. Avoid pumpkin pie filling, sweetened yogurt, flavored yogurt, and products containing xylitol. Dogs that do not tolerate dairy may need a different base. Recipe Snapshot Details Prep Time 10 minutes Freeze Time 3–4 hours Total Time About 4 hours Yield 12–16 small treats Difficulty Easy Method No-bake, frozen Ingredients Equipment Why Pumpkin and Yogurt Work Well Together Pumpkin adds a naturally creamy texture and fiber without needing sugar or other flavorings. Plain cooked pumpkin and 100% canned pumpkin without added ingredients are generally safe for dogs when given in moderation. Plain yogurt provides a creamy base and can contain beneficial bacterial cultures. However, some dogs have difficulty digesting lactose, so yogurt is not suitable for every dog. Greek yogurt is often a practical choice because it generally contains less lactose than regular yogurt. Together, pumpkin and yogurt freeze into small, creamy bites that make a particularly convenient homemade treat. Vet Insight: Pumpkin should not be treated as a cure for ongoing digestive problems. If your dog has persistent diarrhea, constipation, vomiting, appetite changes, or other symptoms, talk with your veterinarian rather than relying on treats. How to Make Frozen Pumpkin Yogurt Dog Treats 1. Combine the pumpkin and yogurt Add the pumpkin puree and plain Greek yogurt to a mixing bowl. Stir until the mixture is smooth and evenly combined. If it seems unusually thick, add 1 tablespoon of water and mix again. Add another tablespoon only if necessary. The finished mixture should be thick enough to spoon into a mold without running everywhere. 2. Fill the molds Place your silicone mold on a small tray or flat plate. This makes it much easier to move the filled mold into the freezer. Spoon the pumpkin-yogurt mixture into each cavity, filling them nearly to the top. Gently tap the tray against the counter once or twice to settle the mixture and release large air pockets. 3. Freeze Place the tray in the freezer and freeze for at least 3–4 hours, or until the treats are completely firm. For larger molds, you may need additional freezing time. 4. Remove and serve Once frozen, gently pop the treats out of the silicone mold. Serve one small treat at a time and keep the remaining treats frozen in an airtight freezer container. Serving, Storage & Variations How Much Should You Give Your Dog? Start with a small portion, particularly if your dog is trying pumpkin or yogurt for the first time. A tiny paw-shaped treat can work well as a starting portion for a small dog, while larger dogs may be able to enjoy a larger treat. The appropriate amount depends on the size of the treat, your dog’s diet, activity level, and individual tolerance. Treats should remain a small part of your dog’s overall daily calorie intake. A commonly used guideline is to keep treats to no more than about 10% of daily calories. Storage Keep the treats frozen in an airtight freezer-safe container or bag. For the best texture and flavor, I like using them within 1–2 months, although they can remain frozen longer if properly stored. Pumpkin and Banana Add a small amount of mashed ripe banana for a naturally sweeter variation. Remember that banana adds additional carbohydrates and calories, so keep the amount modest. Pumpkin and Blueberry A few mashed blueberries can add color and texture. Use plain fresh or frozen blueberries without added sugar. Dairy-Free Option If your dog does not tolerate dairy, you can experiment with a suitable unsweetened, dog-safe dairy-free yogurt alternative. Check the ingredient label carefully for sweeteners and other additives. Owner Tip: Freeze the mold on a small baking tray. It keeps the silicone from bending when you move it and prevents the mixture from spilling before it freezes. Common Mistakes Using pumpkin pie filling Pumpkin pie filling is not the same as plain pumpkin puree. It can contain added sugar and spices or other ingredients that aren’t appropriate for dogs. Stick with a product labeled 100% pumpkin. Choosing flavored yogurt Vanilla, fruit, dessert-style, and sweetened yogurts can contain unnecessary sugar or sweeteners. Plain, unsweetened yogurt is the safer choice. Forgetting to check for xylitol Always check the ingredient list before giving yogurt to your dog. Xylitol is highly toxic to dogs and can cause dangerously low blood sugar and potentially life-threatening complications. Making the treats too large Frozen treats can take longer to eat, so small molds are useful for controlling portions. You can always give another small treat later rather than starting with an oversized one. Giving too many at once Pumpkin and yogurt may be well tolerated in appropriate amounts, but suddenly giving a large quantity of a new food can cause digestive upset. FAQ Can dogs eat pumpkin yogurt treats? Yes. Dogs can generally enjoy treats made with plain 100% pumpkin and plain unsweetened yogurt, provided the ingredients are safe for that individual dog and the treats are given in moderation. Can I use regular yogurt instead of Greek yogurt? Yes,
Apple and Zucchini Chew Sticks for Dogs
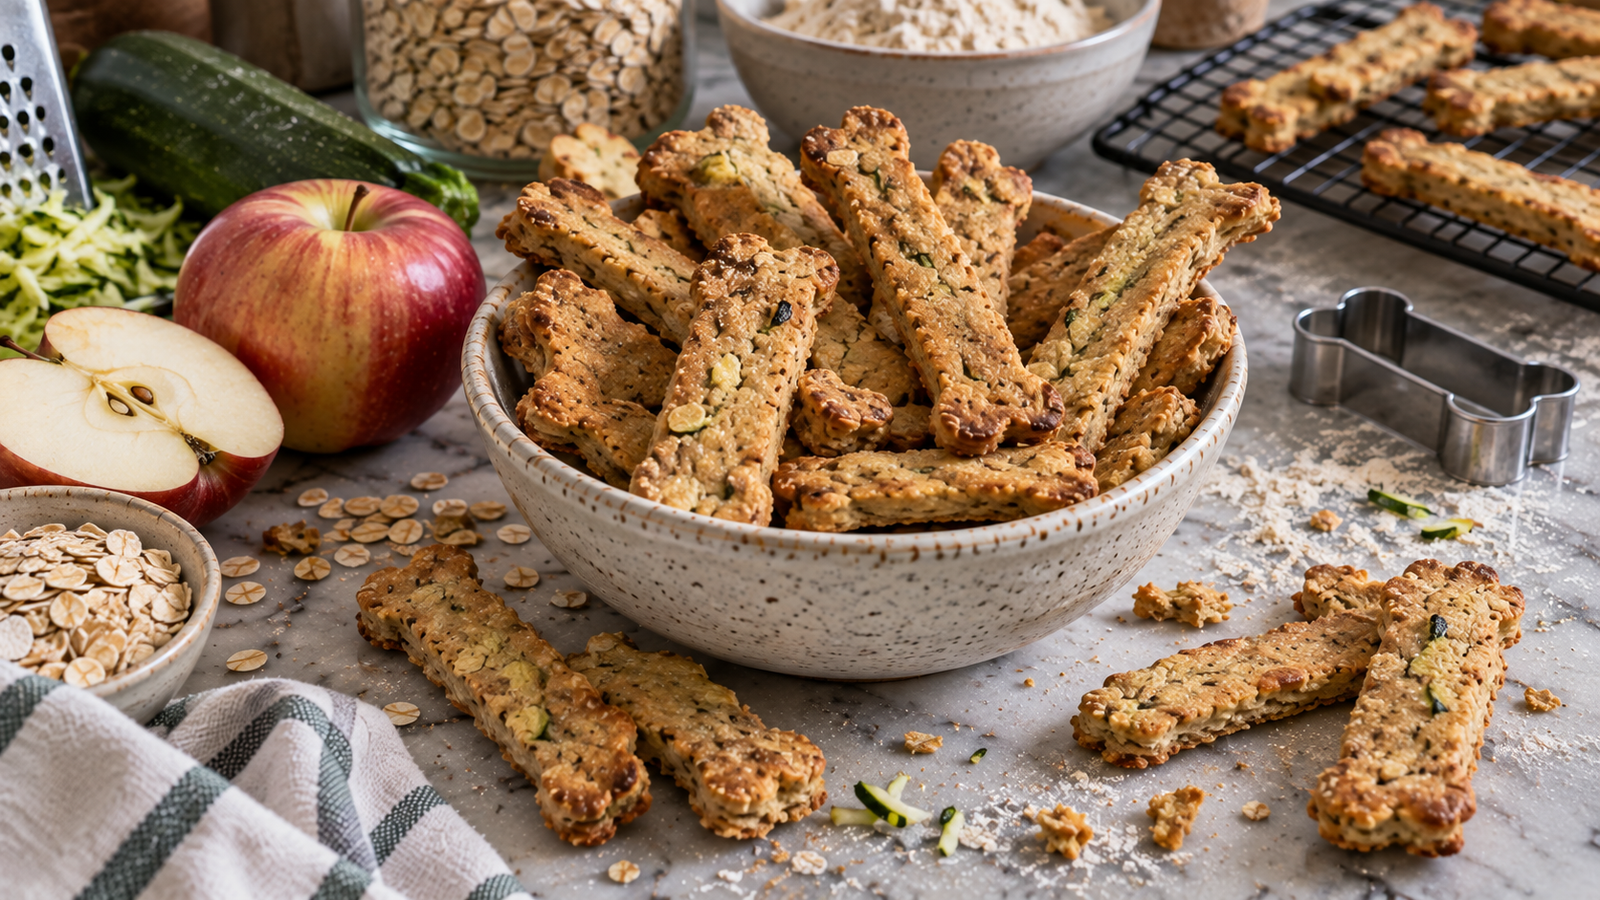
I love making homemade treats that feel a little different from the usual dog biscuits, and these apple and zucchini chew sticks are one of my favorites. They’re simple, lightly sweet from apple, and packed with finely grated zucchini for a soft, wholesome texture. Instead of cutting the dough into traditional little biscuits, I shape it into long sticks. That makes them fun for dogs to hold and nibble, and baking them until firm gives them a more satisfying chew. They’re also a great way to use up a little extra zucchini sitting in the refrigerator. Just make sure the apple is properly prepared, and the zucchini is plain before adding them to the dough. Quick Answer Yes, healthy dogs can generally enjoy homemade apple and zucchini treats in moderation. Wash and prepare apples without the stem, core, or seeds, and keep zucchini plain and free of salt, oil, garlic, onions, and other seasonings. These chew sticks combine both ingredients with oat flour and egg to create a simple baked treat. They are intended as an occasional snack, not a replacement for your dog’s complete and balanced diet. Recipe Snapshot Detail Amount Prep time 15 minutes Bake time 35–40 minutes Drying time 20–30 minutes Total time About 1 hour 10 minutes Yield About 18–24 sticks Difficulty Easy Storage Refrigerator or freezer Key Takeaways Why Apple and Zucchini Work Well in Homemade Dog Treats Apples can be a low-calorie source of fiber and nutrients for dogs when served properly. The important part is preparation: the core, stem, and seeds should be removed before the apple is given to a dog. Too much apple can also cause digestive upset. Zucchini is another dog-friendly ingredient when served plain and in moderation. It provides fiber and several vitamins and minerals while being relatively low in calories. Large pieces of raw zucchini can be difficult for some dogs to chew, which is one reason grating it finely works particularly well in this recipe. The combination works nicely in a baked treat because the apple contributes natural sweetness and moisture while zucchini adds moisture and a mild vegetable flavor. How to Make Apple and Zucchini Chew Sticks for Dogs Ingredients Instructions 1. Prepare the apple.Wash the apple thoroughly. Remove the stem, core, and all seeds. Grate the flesh finely. There is no need to add sugar or cinnamon. 2. Prepare the zucchini.Wash the zucchini and grate it finely. Place it in a clean kitchen towel or several layers of paper towel and squeeze firmly to remove as much water as possible. 3. Squeeze the apple.The grated apple also releases quite a bit of moisture. Give it a gentle squeeze so the dough doesn’t become overly wet. 4. Make the dough.Add the oat flour and whole-wheat flour to a mixing bowl. Stir in the grated apple and zucchini. Add the egg and applesauce and mix until a rough dough forms. If the mixture feels too dry to come together, add water one tablespoon at a time. You want a firm dough that can be rolled without sticking excessively to your hands. 5. Shape the chew sticks.Place the dough on a lightly floured surface and roll it into a rectangle about ¼-inch thick. Cut the dough into strips approximately ½-inch wide and 3–4 inches long. For smaller dogs, make the sticks shorter and thinner. 6. Prepare for baking.Place the sticks on a parchment-lined baking sheet, leaving a little space between them. For a firmer texture, prick each stick once or twice with a fork. This helps some of the internal moisture escape during baking. 7. Bake.Bake at 325°F (165°C) for about 35–40 minutes, turning the sticks halfway through. They should feel firm and look lightly browned around the edges. 8. Dry for a chewier texture.Turn the oven off and leave the sticks inside for another 20–30 minutes with the oven door slightly open. This extra drying step helps remove moisture and produces a firmer chew. 9. Cool completely.Transfer the sticks to a wire rack and allow them to cool completely before giving one to your dog. They will become firmer as they cool. Serving, Storage & Variations How Much Should You Give Your Dog? Start with a small piece, especially if your dog hasn’t eaten apple or zucchini before. Because these are homemade treats, the appropriate amount depends on your dog’s size, calorie needs, activity level, and overall diet. Treats and other extras should generally make up no more than about 10% of a dog’s daily calorie intake. How to Store Them Because these treats contain fresh fruit and vegetables, I prefer storing them in the refrigerator rather than leaving them at room temperature for several days. Once completely cool: If a stick develops mold, an unusual smell, or a noticeably different texture, discard it. Make Them Softer For dogs that prefer softer treats, skip the extra drying step and bake only until the sticks are cooked through and firm around the edges. Store softer versions in the refrigerator and use them more quickly. Make Them Smaller For puppies, small breeds, or dogs that don’t chew large treats comfortably, cut the dough into short strips instead of long sticks. The shape is flexible—the important thing is choosing a size your dog can safely manage. Use Different Apple Varieties Sweet or tart apples can work in this recipe. The important thing is that the apple is fresh and properly prepared, without the core, stem, or seeds. Common Mistakes Leaving the Apple Core or Seeds In Don’t grate the whole apple. Always remove the core, stem, and seeds first. Apple seeds contain cyanogenic compounds, and the tough core can also present a choking or obstruction risk. Not Squeezing the Zucchini Fresh zucchini contains a lot of water. If you add it straight from the grater, the dough can become too wet and difficult to shape. Making the Sticks Too Thick Thick pieces hold more moisture in the center and take considerably longer to dry. Keeping them relatively thin gives
Homemade Pumpkin Biscuits for Dogs
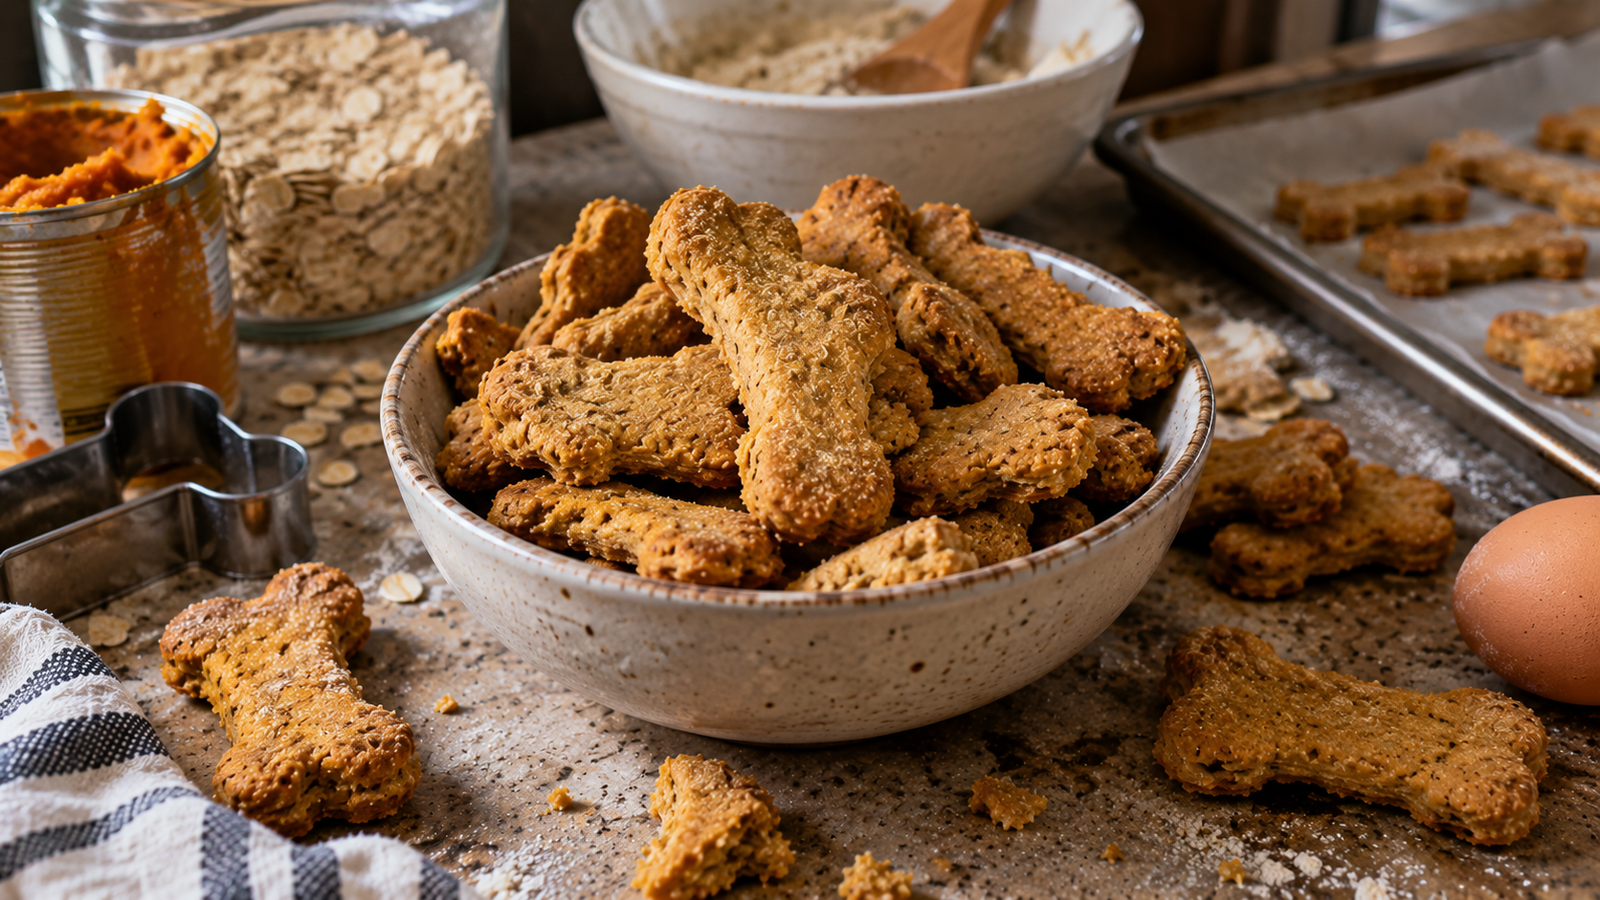
I love making homemade treats for my dog, especially when I have a little extra pumpkin in the kitchen. These homemade pumpkin biscuits for dogs are one of my favorites because they’re simple, lightly crisp around the edges, and easy to make with ingredients I usually already have. I make them into little bone shapes when I have the time, but honestly, my dog cares much more about the smell than the shape. The pumpkin gives these biscuits a naturally warm color and a subtle sweetness without needing added sugar. They’re also a nice option when I want a homemade treat without a long ingredient list. Quick Answer Yes, dogs can eat plain pumpkin, and homemade pumpkin biscuits can be a safe occasional treat when they’re made with dog-friendly ingredients. For this recipe, use 100% plain pumpkin puree, not pumpkin pie filling. Avoid adding sugar, salt, nutmeg, or heavily spiced pumpkin-seasoning blends. Pumpkin is naturally rich in fiber, but too much can still cause digestive upset, so these biscuits should be treated as an occasional snack rather than a replacement for your dog’s regular food. Recipe Snapshot Prep time 10 minutes Bake time 18–22 minutes Total time About 30 minutes Yield About 30–40 small biscuits Oven temperature 350°F / 175°C Best for Occasional treats Key Takeaways Why Pumpkin Works Well in Homemade Dog Biscuits Plain pumpkin is generally safe for dogs when served in appropriate amounts. It provides fiber along with nutrients such as vitamins A, C, and E, potassium, and iron. Its fiber content is one reason pumpkin is sometimes included in dog diets to support normal digestion. That doesn’t mean more pumpkin is always better. Introducing too much pumpkin or too much of any unfamiliar food can lead to digestive upset. These biscuits are therefore best used as treats alongside a complete and balanced diet. The biggest thing to watch is the type of pumpkin you use. Choose: Avoid: Owner Tip: If you’re using canned pumpkin, check the ingredient label. The simplest option is one that lists pumpkin as the only ingredient. How to Make Homemade Pumpkin Biscuits for Dogs Ingredients Instructions 1. Prepare the oven Preheat your oven to 350°F (175°C). Line a baking sheet with parchment paper. 2. Make the oat flour Add the rolled oats to a blender or food processor and pulse until they have a fine, flour-like texture. It doesn’t need to be perfectly smooth. A few small oat pieces are completely fine. 3. Mix the dough Add the oat flour, pumpkin puree, and egg to a mixing bowl. Stir until a soft dough forms. If the dough feels too dry or crumbly, add water 1 tablespoon at a time until it comes together. If it feels very sticky, add a little more ground oats. 4. Roll and cut Lightly dust your work surface with oat flour. Roll the dough to about ¼-inch thick. Cut into small shapes using a dog-bone cookie cutter or another small cookie cutter. Place the biscuits on the prepared baking sheet with a little space between them. 5. Bake Bake for approximately 18–22 minutes, depending on the size and thickness of the biscuits. The edges should look set and lightly browned. For a firmer, crunchier biscuit, you can leave them in the turned-off oven for another 10–15 minutes after baking, with the oven door slightly open. 6. Cool completely Transfer the biscuits to a wire rack and allow them to cool completely before giving one to your dog. They will firm up further as they cool. Serving, Storage & Variations How Many Pumpkin Biscuits Can Dogs Have? Start with a small biscuit, especially if your dog has never had homemade pumpkin treats before. A useful starting point is: These are general treat portions, not veterinary feeding recommendations. Your dog’s size, diet, age, activity level, and health all matter. Keep all treats—including homemade biscuits—to a modest portion of your dog’s daily calories. How to Store Them Because these biscuits contain pumpkin and egg, I prefer refrigerating them rather than leaving a large batch at room temperature for an extended period. Store cooled biscuits in an airtight container in the refrigerator for about 5–7 days. For longer storage, freeze them in a freezer-safe container or bag for up to 3 months. Let a frozen biscuit thaw slightly before serving, particularly for smaller dogs. Can I Make Them Crunchier? Yes. Roll the dough slightly thinner and bake the biscuits toward the longer end of the baking time. You can also allow them to dry further in the warm oven after baking. Just make sure they aren’t so hard that they become difficult for your dog to chew. Can I Use Fresh Pumpkin? Yes. Cook the pumpkin until soft, remove the skin and seeds, and puree the flesh until smooth. Canned pumpkin is simply more convenient. Can I Add Cinnamon? I prefer leaving it out. There’s no need for pumpkin spice to make these biscuits appealing, and avoiding unnecessary seasonings keeps the ingredient list simple. Most importantly, never substitute pumpkin pie filling for plain pumpkin. Pumpkin pie products can contain ingredients such as nutmeg, sugar, and other additives that aren’t appropriate for dogs. Common Mistakes Using pumpkin pie filling This is probably the easiest mistake to make. Pumpkin puree and pumpkin pie filling are not interchangeable. Always check the label before adding pumpkin to your dog’s treats. Adding too many extras Dogs don’t need sugar, frosting, butter, salt, or a complicated spice mixture in their biscuits. Keeping the recipe simple also makes it easier to identify an ingredient if your dog develops an upset stomach. Making the biscuits too large Large homemade biscuits can add calories quickly. Small cutters make portion control much easier, especially when the treats are being used during training. Giving too many at once Pumpkin contains fiber, and a sudden increase in dietary fiber can cause digestive changes. If your dog is trying pumpkin for the first time, start with a small amount and see how they
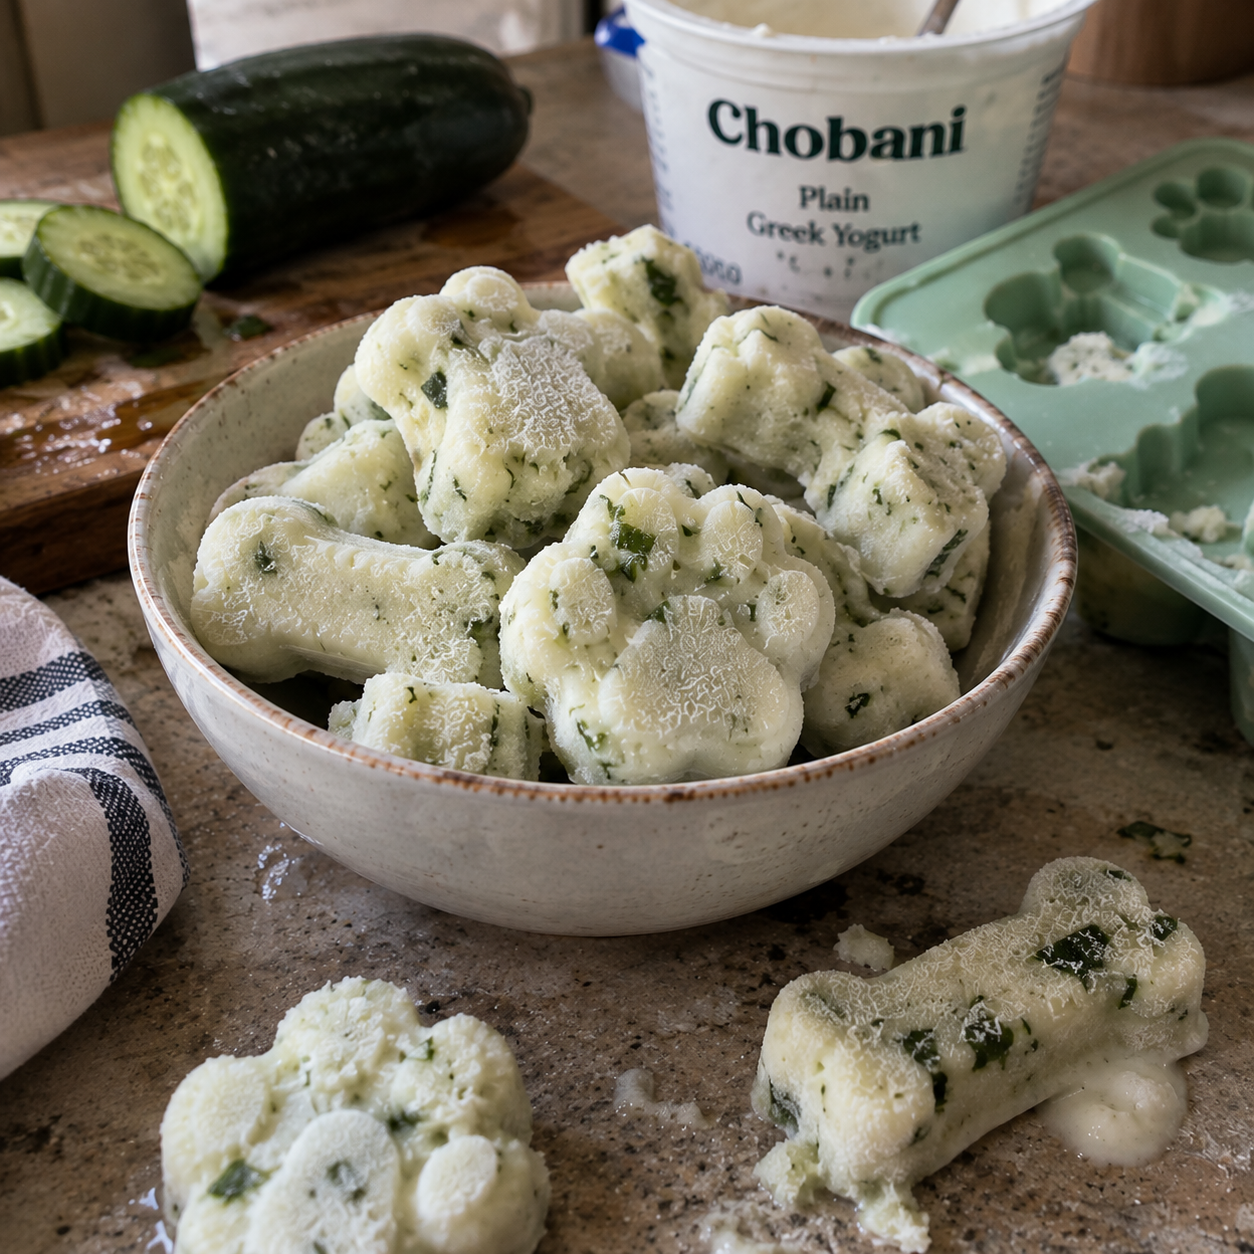
Frozen Cucumber Yogurt Dog Treats
I love having a few easy frozen treats ready for my dog when the weather gets warm, and these cucumber yogurt bites have become one of my favorites. They take just a few minutes to prepare, need only two simple ingredients, and don’t require any baking. The combination of cool cucumber and creamy plain yogurt makes these little treats light and refreshing. I like making them in small silicone molds so I can keep a batch in the freezer and grab one whenever my dog deserves a chilly snack. They’re especially handy on warm afternoons when I want to give my dog something fun without making a complicated recipe. Quick Answer These frozen cucumber yogurt dog treats are made by blending fresh cucumber with plain, unsweetened yogurt, pouring the mixture into small silicone molds, and freezing until solid. They’re simple, refreshing, and easy to portion. Just make sure the yogurt contains no xylitol or other artificial sweeteners, and introduce dairy gradually if your dog isn’t used to it. Recipe Snapshot Prep Time 10 minutes Freeze Time 4 hours Total Time About 4 hours 10 minutes Yield About 12–16 small treats Difficulty Easy Texture Creamy and frozen Best For Occasional treats on warm days Key Takeaways Why Cucumber and Yogurt Work So Well Cucumber has a naturally high water content and a mild, refreshing flavor, while plain yogurt gives the frozen treats a creamy texture. The combination also freezes into a softer treat than plain frozen cucumber, making it easy to portion into small bites. For the cucumber, wash it thoroughly before preparing it. You can peel it for an especially smooth mixture, and removing the seeds can also help create a smoother texture. For the yogurt, choose plain and unsweetened. Greek yogurt is a convenient option because it tends to contain less lactose than some other yogurts, although individual dogs can still have trouble digesting dairy. How to Make Frozen Cucumber Yogurt Dog Treats Ingredients Optional: 1–2 tablespoons water if needed for blending Equipment 1. Prepare the Cucumber Wash the cucumber thoroughly. Peel it if you prefer a smoother treat, then chop it into small pieces. For an especially smooth texture, remove the seeds before blending. 2. Blend the Ingredients Add the chopped cucumber and yogurt to a blender or food processor. Blend until smooth and creamy. If the mixture is too thick to pour easily, add a small amount of water and blend again. You don’t want to add too much water—the mixture should still have enough body to freeze into solid treats. 3. Fill the Molds Place your silicone molds or ice cube tray on a flat baking sheet. Pour the cucumber-yogurt mixture into the cavities, leaving a little room at the top. Using a baking sheet underneath makes the filled molds much easier to move into the freezer without spilling. 4. Freeze Transfer the molds to the freezer. Freeze for at least 4 hours, or until the treats are completely solid. For the firmest texture, leaving them overnight works well. 5. Remove and Store Once frozen, gently pop the treats out of the molds. Transfer them to an airtight freezer-safe container or freezer bag. Keep them frozen until you’re ready to serve them. Serving, Storage & Variations Serving Size Start with one small treat when introducing the recipe. The appropriate amount depends on your dog’s size, overall diet, and tolerance for dairy. Smaller dogs may only need a portion of a larger frozen treat. Frozen treats can also be firm, so supervise your dog while eating, especially if they tend to swallow treats quickly. Storage Keep the treats in an airtight freezer-safe container. For the best texture and freshness, use them within about 2 months. Keeping them covered also helps prevent freezer odors from affecting their flavor. Making Smaller Treats For small dogs, use a mini silicone mold or standard ice cube tray. Smaller portions are easier to serve and make it simpler to keep treats within your dog’s daily calorie allowance. Using Lactose-Free Yogurt If your dog has trouble with regular dairy, you can use a plain lactose-free yogurt instead. Always check the ingredient list and choose an unsweetened option without xylitol or other unsafe sweeteners. Adding Other Dog-Friendly Ingredients You can keep the recipe exactly as written, or add a small amount of another dog-friendly ingredient such as finely blended blueberries or banana. Keep additions simple and avoid turning a light frozen treat into a high-calorie dessert. Common Mistakes Using Flavored Yogurt Vanilla, fruit, and dessert-style yogurts often contain added sugar or other ingredients you don’t need. Plain, unsweetened yogurt is the better choice. Not Checking for Xylitol Always read the yogurt label before using it. Never use yogurt containing xylitol. Making the Treats Too Large Large frozen treats can be difficult for smaller dogs to manage. Small molds are ideal because they make portion sizes easier to control. Adding Too Much Water A little water can help a thick mixture blend, but too much will create icy, watery treats. Start with a tablespoon and add more only if necessary. Serving Them Too Quickly The treats need enough time to freeze completely. Give them at least four hours, and preferably freeze them overnight when possible. Giving Too Many Even simple homemade treats count toward your dog’s daily intake. One or two small treats can be plenty depending on your dog’s size and overall diet. FAQ Can dogs eat cucumber? Yes. Plain cucumber can be given to dogs as an occasional treat. Wash it thoroughly and cut it into manageable pieces. Can dogs eat yogurt? Many dogs can have plain yogurt in moderation, but some dogs have difficulty digesting lactose. Start with a small amount and see how your dog responds. What type of yogurt is best for dogs? Plain, unsweetened Greek yogurt is a convenient choice. Avoid products containing xylitol, added sweeteners, or unnecessary flavorings. Can puppies eat frozen cucumber yogurt treats? Healthy puppies that are already eating solid food can have a small
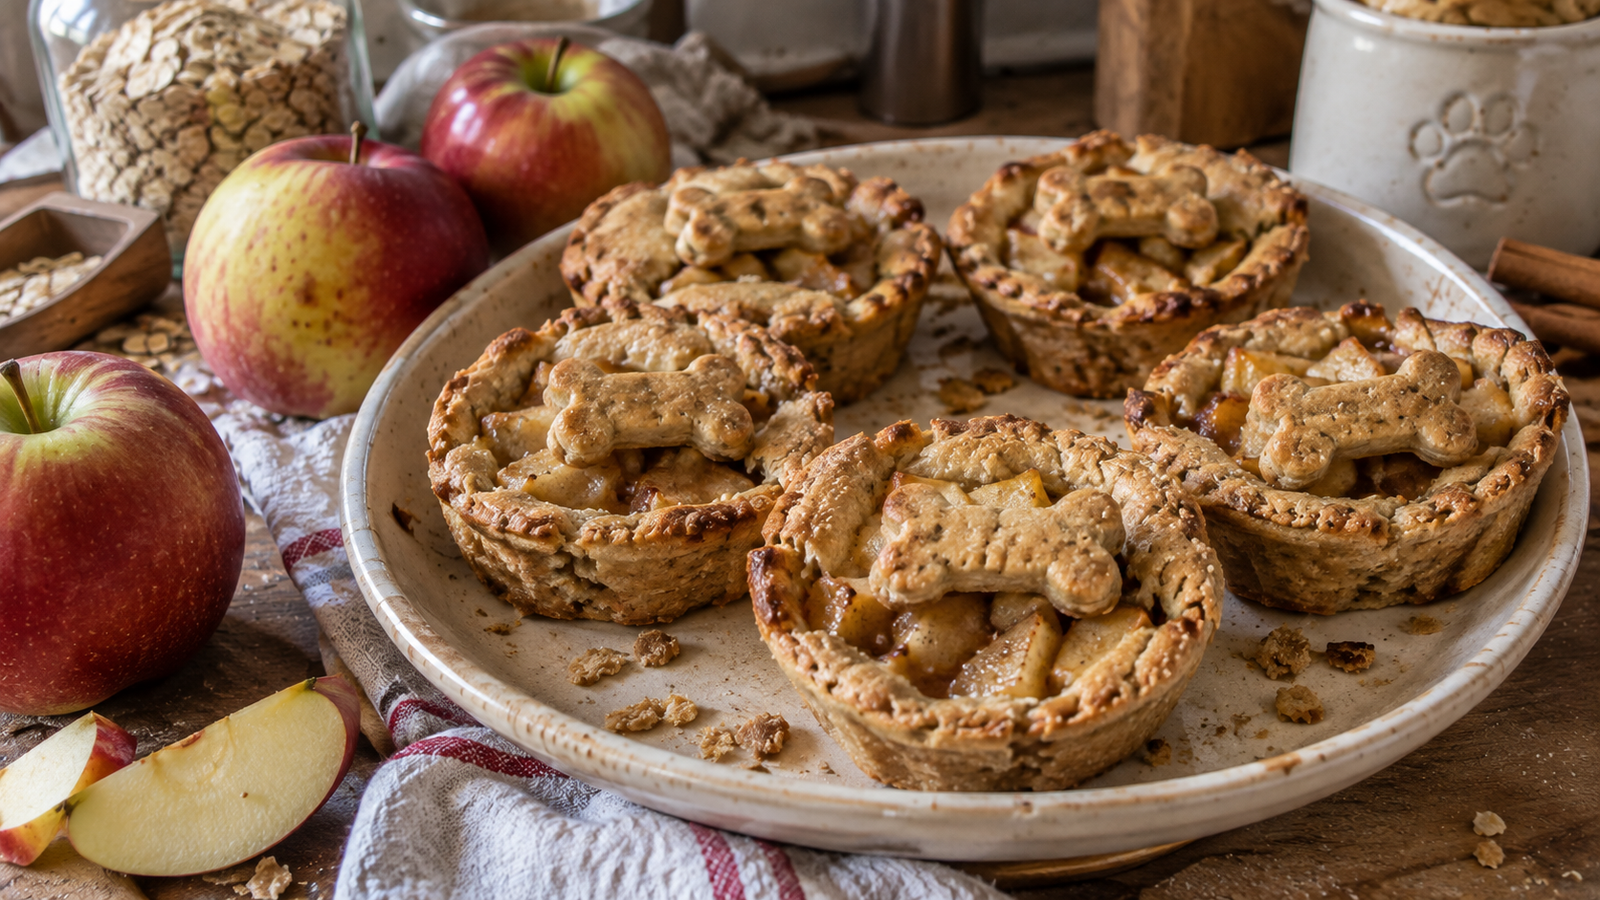
Homemade Apple Pie for Dogs
I love making little homemade treats for my dog, especially when I can take something I enjoy, like apple pie, and turn it into a version they can safely enjoy too. This homemade apple pie for dogs is one of those recipes. It has soft, warm apples, a little cinnamon, and a simple homemade crust without all the sugar and extras that go into a traditional apple pie. I usually make these as small individual pies because they’re cute, easy to portion, and perfect for a special treat. They also make the kitchen smell amazing while they’re baking! Quick Answer Yes, dogs can enjoy a small homemade apple pie made specifically with dog-friendly ingredients. This version uses fresh apples, plain unsweetened applesauce, a small amount of cinnamon, and a simple homemade crust. It contains no added sugar, raisins, nutmeg, chocolate, or artificial sweeteners. Serve it as an occasional treat and allow the pie to cool completely before giving it to your dog. Recipe Snapshot Prep Time 25 minutes Cook Time 25–30 minutes Total Time About 55 minutes Yield 6 small mini pies Oven Temperature 350°F (175°C) Texture Soft apple filling with a firm crust Best For Occasional treats Key Takeaways What Makes This Apple Pie Dog-Friendly? Traditional apple pie can contain plenty of sugar, butter, rich pastry, and heavily spiced filling. A dog-friendly version doesn’t need all of those ingredients. This recipe focuses on a few simple components that work well together: There is no added sugar, and the filling is kept simple so you can control exactly what goes into your dog’s treat. Preparing the Apples Apples can be used as an occasional treat for dogs, but preparation matters. Wash the apples thoroughly, then remove the stem, core, and seeds before chopping. Cut the apple into small pieces so the filling cooks evenly and is easier for your dog to eat. You can leave the skin on if the apples are washed well, although peeling them can produce a softer filling. Keeping the Filling Simple The apples and unsweetened applesauce provide plenty of natural sweetness, so additional sugar isn’t necessary. Choose applesauce that contains only simple ingredients and does not contain added sweeteners or spices. A small amount of cinnamon adds the familiar apple-pie flavor without making the filling heavily spiced. Ingredients to Avoid Keep this recipe different from a traditional human dessert by leaving out ingredients that aren’t appropriate for dogs. Do not add: How to Make Homemade Apple Pie for Dogs Ingredients For the Crust For the Apple Filling Equipment 1. Prepare the Oven Preheat the oven to 350°F (175°C). Lightly grease six muffin cups or small pie tins. 2. Make the Crust Add the whole-wheat flour and ground oats to a mixing bowl. Stir in the cooled melted coconut oil and applesauce. Mix until the dough starts coming together. Add water one tablespoon at a time if necessary. Stop adding water as soon as the dough becomes soft enough to roll. The dough should be workable without being sticky. 3. Roll and Shape the Crust Lightly flour your work surface and roll the dough to approximately ⅛ inch thick. Cut six circles slightly larger than the muffin cups or mini pie tins. Gently press each piece of dough into the cups, working it slightly up the sides. Reserve some dough if you’d like to add simple decorative pieces to the tops. 4. Prepare the Apples Wash the apples thoroughly. Remove the stems, cores, and seeds. Chop the apples into small pieces. Small pieces will soften more quickly and make the finished filling easier to portion. 5. Cook the Filling Add the chopped apples, applesauce, and cinnamon to a small saucepan. Cook over medium-low heat for about 5–8 minutes, stirring occasionally, until the apples begin to soften. In a small bowl, mix the cornstarch with 2 tablespoons of water. Stir the mixture into the apples and continue cooking for another 1–2 minutes, until the filling thickens. Remove from the heat and allow it to cool slightly. 6. Fill the Pies Spoon the apple filling into the prepared crusts. Don’t overfill them. Leave a little room at the top so the filling doesn’t bubble over during baking. If desired, use leftover dough to make small strips or simple bone-shaped decorations for the tops. 7. Bake Bake for 25–30 minutes, or until the crust is lightly golden and cooked through. The exact baking time will vary depending on the size and thickness of your pies. 8. Cool Completely Remove the pies from the oven and place them on a cooling rack. Allow them to cool completely before serving. The apple filling can stay very hot even after the crust begins to cool, so check the center carefully. Serving, Storage & Variations Serving Size These mini pies are intended to be occasional treats. A reasonable starting portion is: Your dog’s ideal treat portion depends on their size, activity level, overall diet, and individual calorie needs. If you’re introducing the recipe for the first time, start with a smaller portion and see how your dog responds. Storage Allow the pies to cool completely before storing. Place them in an airtight container and refrigerate for 5–7 days. For longer storage, freeze individual pies in a freezer-safe container with parchment between them. Frozen pies can be stored for up to 3 months for best quality. Thaw them in the refrigerator before serving. A Simple Topping For an occasional special treat, you can add a small spoonful of plain, unsweetened Greek yogurt after the pie has completely cooled. Choose plain yogurt without added sugar, artificial sweeteners, fruit flavoring, or other unnecessary ingredients. Making Smaller Pies For small dogs, use a smaller cutter or mini muffin tin to create bite-sized portions. Smaller pies also make it easier to control how much your dog receives at one time. Making One Larger Pie You can bake the recipe as one small pie instead of making individual portions. Keep in mind that a larger pie will require additional baking